



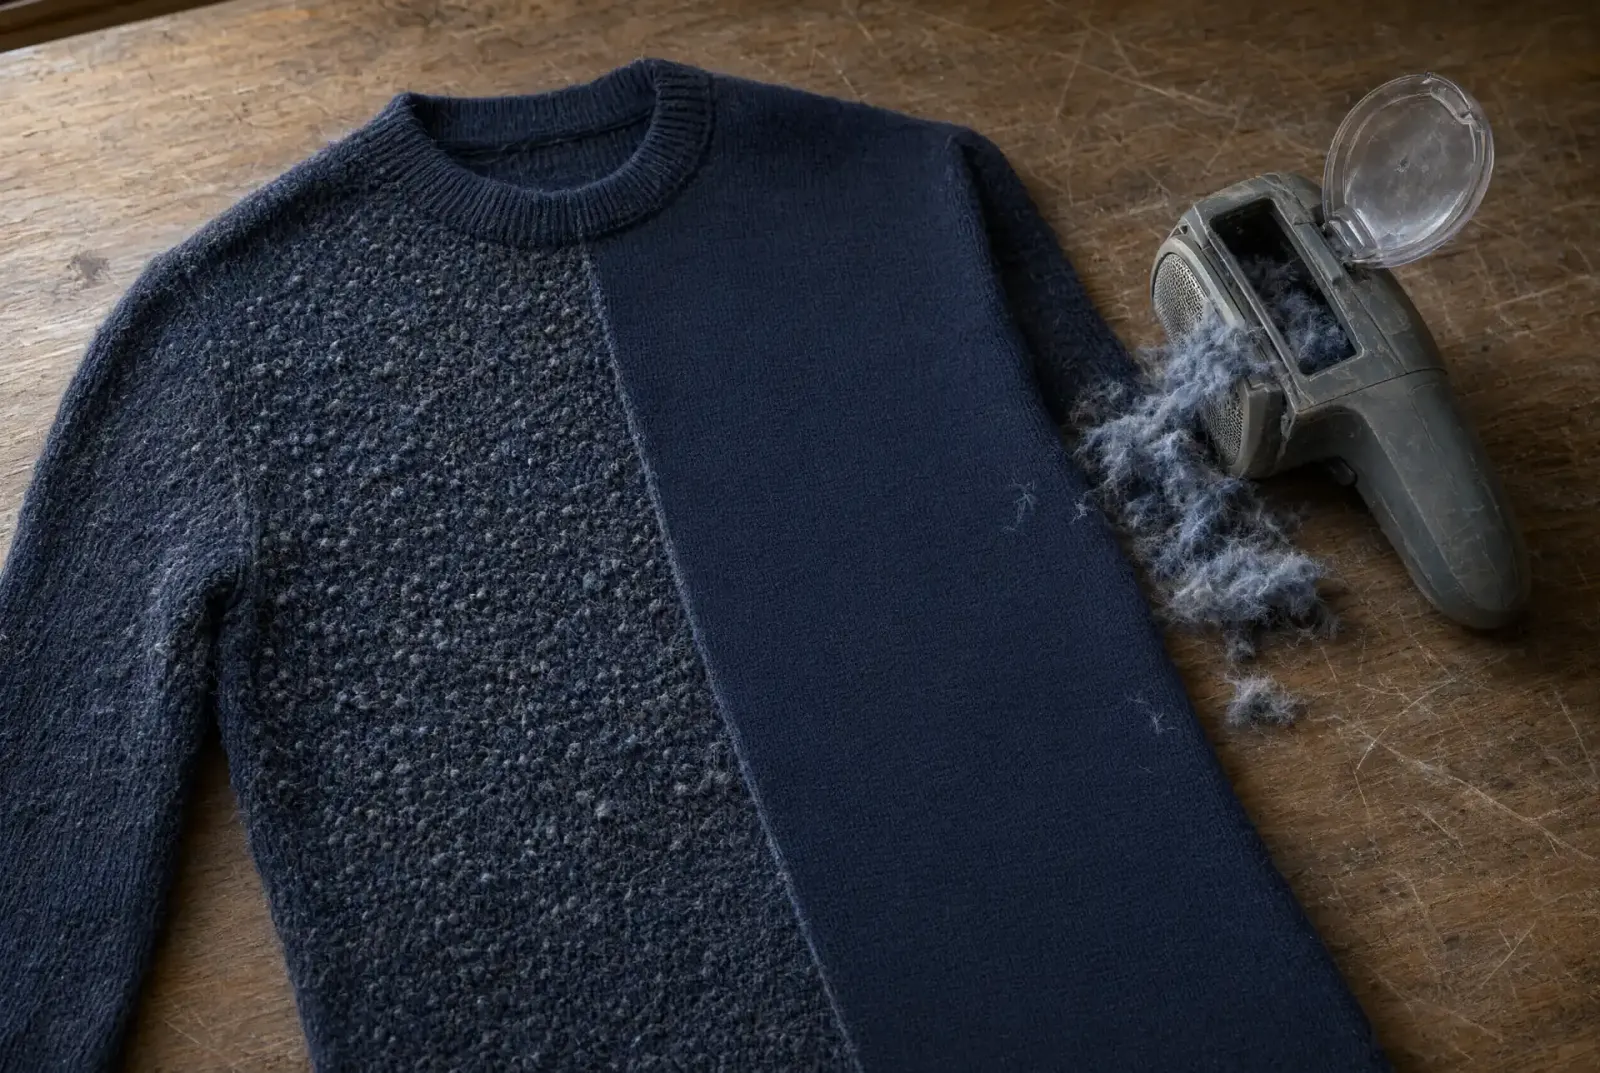
A client brought me a navy merino crewneck two winters back. She had attacked the chest panel with a brand-new five-blade cartridge razor she found in the bathroom cabinet. Two holes, nickel-sized, right where everyone looks. Reknitting them cost more than she had paid for the sweater at outlet price.
That job is the reason I am careful about how I explain this. Depilling is not hard. Depilling badly is permanent.
Three years on the bench, mostly high-end knitwear, technical outerwear, and a steady stream of gym clothes people are embarrassed to hand over. What follows is what I actually do, in the order I actually do it, including the tools I keep locked away from customers.
The Mechanics of Fabric Pilling
A pill is not dirt. It is not wear-through. It is your garment’s own fiber, migrated to the surface and rolled into a ball.
Four stages occur, and they happen in this order every single time:
Fuzz forms as loose fiber ends work their way out of the yarn structure.
Entanglement begins when those free ends tangle with each other under continued rubbing.
Growth happens as the tangle gathers more surface fiber as it goes.
Shedding or Retention: On some fabrics, the pill breaks off and disappears. On others, it hangs on permanently.
That last stage is the whole story. Whether a pill falls off or hangs on decides everything.

Fiber Length and Continuous Filaments
Staple length is the first variable. Short-staple fibers have more ends per square centimeter of fabric, and every end is a candidate for migration. Upland cotton runs roughly 22–28mm. Cashmere sits around 34–40mm on decent grades, shorter on the cheap stuff blended down with recycled fiber. Long-staple wools, combed cotton, and compact-spun yarns simply have fewer loose ends poking out. That is why a tightly spun worsted suit fabric barely pills while a soft-spun woolen jumper turns fuzzy in a fortnight.
Continuous filament yarns—nylon, filament polyester, the face yarns in most technical shells—theoretically should not pill at all, since there are no staple ends to migrate. In practice, they fibrillate. Abrasion splits the filament surface, raises microscopic hairs, and those hairs tangle. Different mechanism, same ugly result.
Fiber Tenacity and Poly-Cotton Blends
Fiber tenacity decides whether the pill leaves:
Wool runs about 1.0–1.7 g/denier dry. It is weak. Pills form fast on wool, then snap off at the anchor point and vanish into the air, which is why a pure lambswool sweater goes through a fuzzy adolescence and then settles down.
Polyester runs 4–7 g/denier. It does not snap.
This is the whole tragedy of the poly-cotton blend. Cotton fuzz migrates up and tangles, the pill grows, and then it tries to break free—but there is a polyester filament running through it like rebar. The synthetic content acts as an anchor thread. Your 60/40 sweatshirt develops permanent, welded-on nubs that a wool sweater would have shed by March. I have watched hundreds of gym hoodies fail this exact way. The cotton does the pilling; the polyester does the holding.
Garment Construction
Construction matters as much as fiber. Low twist per inch, loose knit density, and a brushed or napped finish all raise the pilling rate. Jersey pills more than interlock. Interlock pills more than a tight double knit.
Industry Testing Standards
If you want to know how the industry measures this, the standards are worth naming:
ISO 12945: Covers fabric propensity to surface fuzzing and pilling. Part 1 is the pilling box method, Part 2 is the modified Martindale, and Part 3 is the random tumble pilling tester.
ASTM D3512: The American random tumble method. Specimens tumble in a cork-lined chamber with a small amount of grey cotton lint for a set duration, usually 30 or 60 minutes.
Assessment is visual against photographic standards, graded 1 to 5:
Grade 5: No surface change.
Grade 1: Severe pilling.
Anything rated grade 4 or above is what mills market as "anti-pill." A grade 2 fleece will look destroyed after a season. When a fleece jacket claims anti-pill on the hangtag, that is the test it is referencing, and honest brands will tell you the grade if you ask their technical department.
Knowing this changes how you shop. It also tells you which of your garments will need depilling once a year and which will need it monthly, forever.
5 Depilling Methods, Ranked by Fabric Risk
Ordered from safest to most dangerous. Start at the top of this list and only move down if the fabric genuinely needs it.
General Prep & Golden Rules
Never pull a pill off with your fingers: That pill is still connected to fibers that are part of the fabric structure. Pulling migrates more fiber out of the yarn, loosens the stitch around it, and on a fine-gauge knit, it starts a run. I can spot finger-picked knitwear across the shop—it has a bald, thinned look with tiny puckers.
Work on a hard, flat surface: Use a dining table, a cutting mat, or a clean countertop. Do not work on a bed or a padded ironing board. Padding lets the fabric dome upward into the tool, which is how you accidentally cut a hole in it.

1. Fine-Tooth Sweater Comb (Lowest Risk)
A small metal-toothed comb, usually brass or aluminum, with teeth spaced far tighter than a hair comb. This is the tool I reach for on anything I would be sick about damaging.
Ideal Fabric Match: Cashmere, baby alpaca, fine merino, angora, mohair, loose-gauge hand knits, anything under 12 gauge, vintage pieces, and anything with visible loft you want to keep.
Angle and Pressure: Hold the comb at roughly 45 degrees to the fabric surface. Lay the garment flat and unstretched—use your free hand to keep it flat, not taut. Use short strokes of two to three inches, always moving with the wale (the vertical columns of stitches on the face of the knit). Lift the comb completely off the fabric at the end of each stroke and reset; do not drag it back. Pressure should be barely more than the weight of the comb. If the fabric surface drags along with the comb, you are pressing four times too hard.
Maintenance: Debris collects between the teeth. Clear it every ten or twelve strokes with your thumbnail, or you will start dragging a mat of loose fiber back across the sweater.
Expert Warning: The teeth catch loops, not just pills. On a loose-gauge knit, a caught loop can pull a run three inches long before you notice. The moment you feel resistance, stop—do not yank. Back the comb out along the exact path it came in. Combing across the wale instead of with it roughly triples the snag rate. Skip the comb entirely on anything with a bouclé or slub yarn, as those deliberate irregularities read as pills to the teeth and will be ripped out.
Note: It is slow. A full men's medium crewneck takes 35 to 45 minutes by comb, but it is worth every minute on good cashmere.
2. Electric Fabric Shaver (Low to Moderate Risk)
Rotating blades spinning under a perforated metal screen. Fabric bulges through the holes, the blades trim it flush, and an internal fan pulls debris into a collection chamber. Hole diameter on the screen determines aggression—larger holes let more fabric protrude and cut deeper.
Ideal Fabric Match: Mid-gauge and heavy knits, cotton jersey, sweatshirting, fleece, poly-cotton blends, wool blends, upholstery, blankets, and felted wool.
Angle and Pressure: Hold the screen flat against the fabric at 90 degrees with full face contact. Let the tool's own weight supply all the pressure—every extra gram you press down pushes fabric further through the holes and closer to the blades. Work in eight-inch panels using small overlapping circles or short straight passes. Keep the panel flat with your free hand without stretching it. (A stretched knit shaved flat becomes a hole when it relaxes).
Maintenance: Empty the catch chamber every few minutes. A full chamber kills airflow, causing blades to clog into a felted plug that tugs fabric instead of cutting it cleanly.
Settings: If your shaver has an adjustable spacer comb, start on the highest setting (furthest from the fabric) and only step down if pills survive the first pass.
Expert Warning: Seams, ribbing, buttonholes, and raised trim can get sucked into the screen and severed. Approach a seam from the flat side and stop half an inch short every time. Never run the shaver over a seam allowance. On garments containing elastane, blades will sever elastic filaments; cut elastane in a jersey knit produces a visible ladder that repair cannot fully hide. Avoid cheap AA-powered units—their motors stall under load, causing drag that leads to tears. A mains-powered or lithium unit provides the torque needed for clean cuts.
3. Friction Strips and Pumice Sponges (Moderate Risk)
Rubber or foam blocks embedded with grit, coarse nylon abrasive pads, and tacky pill-remover strips. They do not cut; they grab loose surface fiber and roll it off through friction.
Ideal Fabric Match: Fleece, sweatshirting, sock heels, upholstery, car seats, and curved or awkward zones where rigid tools cannot sit flat (elbows, underarms, inside raglan sleeves, sports bra bands).
Angle and Pressure: Use a small circular buffing motion—about the size of a coin—with very light contact. Work over a towel or trash bin because debris rolls into small grey clumps. Perform six or eight circles, wipe the surface, inspect, and continue. Working longer in one spot risks abrading the base fabric.
Expert Warning: On brushed and napped surfaces, these tools can raise more fuzz than they remove. Buffing a napped fleece too enthusiastically generates a fresh crop of surface fiber that pills again quickly. They also glaze high-twist worsted wool—friction flattens and shines the surface permanently. Test on an inside hem for 30 seconds before touching visible panels.
4. Single-Blade Safety Razor (High Risk)
Effective and affordable, but responsible for more ruined knitwear than any other method when used improperly.
Ideal Fabric Match: Dense flat knits with tight stitch density, cotton sweatshirts, heavy jersey, tight-gauge machine knits, and canvas-backed upholstery. If you cannot clearly see individual stitches at arm's length, it is dense enough to consider.
Angle and Pressure: Use a single blade only—never a multi-blade cartridge razor. Cartridge guard bars lift fabric loops into the cutting path. Use a slightly worn blade rather than a fresh one for safety. If the razor has a lubricating strip, pull it off with pliers so it does not stain light fabrics when warm. Smooth the garment without stretching. Hold the razor at 20 to 30 degrees off the fabric plane (nearly flat). Make short downward strokes of two to three inches following the wale. Apply zero downward pressure.
Maintenance: Lint-roll the panel between passes to see remaining pills clearly.
Expert Warning: Loose knits, chunky hand knits, cashmere, and open-structure garments will cut rather than shave. When the blade strikes a loop under tension, it severs it instantly, creating a hole. Never work on damp fabric, never use water or gel, and never razor over seams, ribs, or shoulder joins. If initial test strokes on an inside hem sever even one loop, stop immediately.
5. Sweater Stone (Highest Risk)
A block of foamed volcanic glass (open pumice). It crumbles as it works, continually exposing fresh abrasive edges.
Ideal Fabric Match: Heavy wool, boiled wool, wool coats, thick fisherman knits, wool blankets, and heavy felt. Use only on robust, high-mass fabrics.
Angle and Pressure: Place the flat face against the fabric. Make short strokes of one to two inches in one direction only, using almost no downward force. Let the texture of the stone do the work. Work over a drop cloth or outdoors to manage grit and dust.
Maintenance: Brush the panel with a garment brush every dozen strokes to clear crumbs and check progress.
Expert Warning: This tool destroys fine-gauge knitwear and can chew cashmere into a thinned mess in under a minute. It is incompatible with anything containing elastane, as the abrasive shreds elastic filaments. It also raises unintended nap. Reserve it strictly for heavy outerwear and durable home textiles.
Depilling Tools Comparison Matrix
| Tool | Target Fabric | Skill Level | Speed | Ruin Risk |
| Fine-Tooth Sweater Comb | Cashmere, fine merino, angora, alpaca, loose gauge, vintage | Low | Slow (35–45 min per sweater) | Very low |
| Electric Fabric Shaver | Mid/heavy knits, jersey, fleece, poly-cotton, upholstery | Low–moderate | Fast (12–18 min per sweater) | Low on flat panels; moderate at seams/ribs |
| Friction Pad / Pumice Sponge | Fleece, sweatshirting, socks, upholstery, curved zones | Low | Moderate | Moderate (can glaze worsted or re-fuzz nap) |
| Single-Blade Safety Razor | Dense flat knits, cotton sweatshirts, tight jersey | High | Fast | High (can cut loops on loose knits) |
| Sweater Stone | Heavy wool, boiled wool, blankets, wool coats | Moderate | Fast | High (fatal on fine gauge and elastane) |
Fabric-Specific Troubleshooting and High-Friction Zones
Spandex and Lycra Activewear
Elastane itself does not pill; it is a continuous filament wrapped inside nylon or polyester face yarns. What pills on leggings is the face yarn fibrillating under abrasion—primarily at inner thighs, the seat, and under sports bra bands.
Do not use razors or sweater stones on activewear under any circumstances.
For dense four-way stretch double knits, a fabric shaver on its highest spacer setting moved slowly with zero pressure can be used. Test on an inside waistband first.
For thin single jersey, mesh panels, or swimsuits, use curved-tip embroidery scissors to snip individual pills at their base one at a time. This avoids severing elastic filaments that cause fabric ladders.
Prevention Note: Fabric softener and dryer heat degrade elastane quickly. Washing activewear alongside abrasive items like denim or towels is a primary cause of premature pilling.
Ribbed Cuffs, Collars, and Button Bands
Rib knits feature alternating raised columns where pills nestle down in the valleys. Avoid stretching the rib flat to shave it, as this cuts the load-bearing tops of the raised wales, causing cuffs to lose stretch recovery. Running an unsupported shaver over a cuff can also suck the entire trim into the screen.
Recommended Approach: Slide a rolled towel or wooden dowel inside the cuff to support its natural circumference without stretching it. Comb downwards along the wale using a sweater comb, and snip stubborn pills with small scissors.
High-Rub Zones and the "Halo Effect"
Pilling concentrates where friction occurs:
Inner thighs on trousers and leggings.
Diagonal seatbelt contact points across the chest.
Backpack and shoulder strap lines.
Underarms and inner sleeves.
Forearms and cuffs resting on desks.
Lower back and seat panels from chairs.
Important Technique: Depilling only an isolated fuzzy patch on a dark garment leaves that spot smoother and darker than surrounding fabric, creating a visible "halo." Because fuzz scatters light while shaved fabric reflects it evenly, always treat the entire panel (the whole front, back, or sleeve) to maintain uniform texture and light reflection.
Prevention Protocol
Implementing these five laundering habits reduces pilling significantly before tools are needed:
Turn garments inside out and secure hardware: Outer-facing surfaces take the most drum friction. Zip all zippers, fasten hooks, and secure Velcro. An open bra hook can damage multiple garments during a single cycle.
Switch to liquid detergent for knits: Powder detergents contain undissolved mineral builders (such as zeolites) that act as surface abrasives in cold cycles. Liquid detergent eliminates this friction. For cotton, formulas with cellulase enzymes help remove microfibrils. For wool, silk, and cashmere, use enzyme-free wool washes to protect protein fibers.
Select gentler wash cycles: Use delicate or wool cycles featuring lower drum speeds, longer soak times, cold water (or 30°C max), and reduced spin speeds (600–800 RPM). Sort loads by weight and texture—never mix delicate knits with denim, towels, or zippered items. Keep the drum roughly 70% full to avoid garment grinding or heavy impacts against the drum.
Air-dry knitwear: Tumble dryers combine heat, low humidity, and continuous tumbling—ideal conditions for fiber migration. Lay knits flat on mesh drying racks and reshape them while damp.
Use mesh bags and allow rest days: Fine-mesh laundry bags isolate delicate items from friction during washing. Additionally, allow knitwear to rest for 24 hours between wearing. Resting allows wool and cashmere fibers to recover their natural crimp and release moisture, making them more resilient against pilling.
Final Thoughts on Garment Care
Every depilling pass removes a small amount of fiber. On fine-gauge knitwear, expect roughly four to six thorough depilling sessions over a garment's life before the fabric begins to feel thin or papery. Heavy wool tolerates more sessions, while synthetic blends tolerate fewer because cutting cotton fibers leaves an exposed polyester framework.
Spacing out care to two thorough, even sessions per season on winter sweaters yields better longevity than frequent spot treatments. Between sessions, regular use of a garment brush and allowing rest days will prevent loose fibers from matting into pills.