



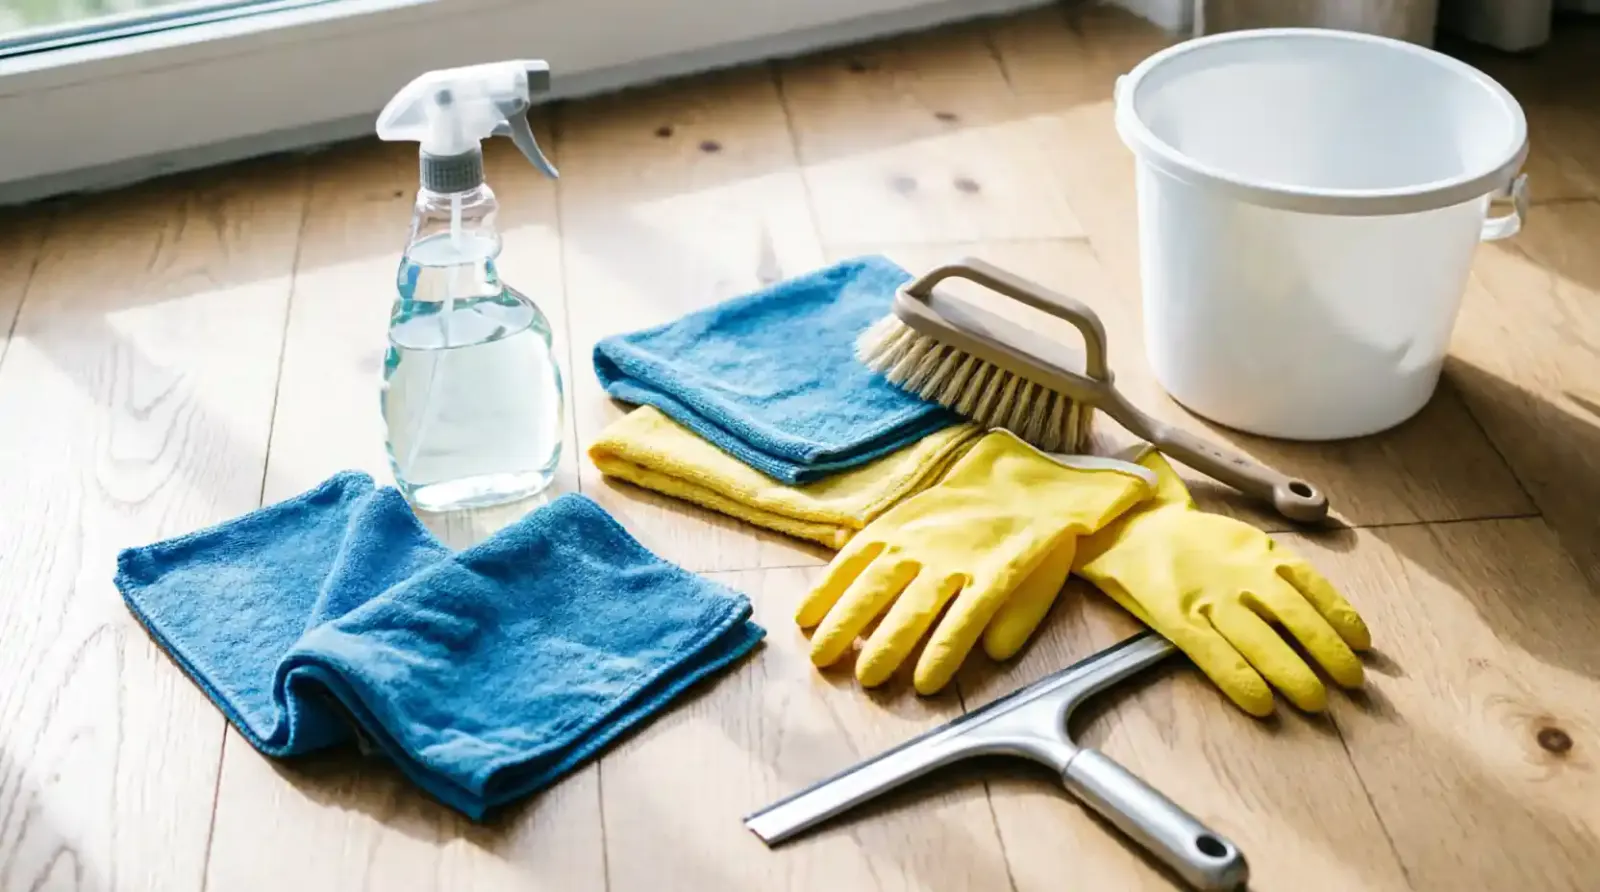
In my organizing business, I've found that most homeowners confuse "picked up" with "actually clean." After many years managing deep-cleaning operations for homes and estates, the single biggest trade-off I see on an annual job is this: do you just tidy the visible surfaces, or do you methodically remove the built-up soils that have been settling for months?


That distinction is exactly what separates effective cleaning for spring from a light weekend wipe-down. It's not about how many spray bottles you go through. It's about the order, the chemistry, the tools, and the discipline to not re-contaminate the areas you just cleaned.
The Ergonomics & Sanitation Science of Deep Cleaning
When my team deep-cleans a home, we don't guess. We work off of physical laws and chemistry. Dust falls. Moisture moves. Cleaners have a pH. People fatigue. Ignoring any one of these creates avoidable damage or wasted labor.
1.1 Annual Deep Cleaning vs. Weekly Maintenance
From the field, I classify cleaning on two timelines:
- Weekly maintenance removes fresh, loose soil (crumbs, light dust, and daily spills) before it bonds to a surface.
- Annual deep cleaning (what most people mean by spring cleaning) focuses on bound soils. These are oils, mineral deposits, skin cells, cooking grease, soap scum, and microscopic dust that have adhered to, and sometimes settled into, textures and crevices over the course of months.
A practical rule I use with clients: if a soil can be lifted with a dry, high-quality microfiber cloth in under 10 seconds with light pressure, it's likely maintenance-level. If it requires the correct chemical, dwell time, and mechanical agitation to release, it's a deep-clean item.
1.2 Airborne Dust Settlement Patterns
Dust isn't random. It follows gravity and airflow. In almost every home I've serviced, I see a predictable pattern: the highest horizontal surfaces (top of cabinets, crown molding, ceiling fans, door headers, and the tops of tall furniture) collect the finest, lightest dust first. Heavier particles settle closer to floor level and near entry points.
Forced-air HVAC systems complicate this. When your system runs, it re-suspends settled dust, blowing it onto walls, blinds, furniture and back onto freshly cleaned floors. This is why I will never wet-clean a floor before I've dry-dusted the airspace above it.
1.3 The Golden Rule: Top-to-Bottom, Dry-Before-Wet
I enforce one non-negotiable sequence on every job: top-to-bottom, dry-before-wet.
- Top-to-bottom: Start at the highest point in a room, working down to the baseboards and floors. Gravity does the work for you instead of undoing your work.
- Dry-before-wet: Remove as much loose particulate (dust, pet hair, crumbs) with a dry tool before introducing any moisture or liquid cleaner. Introducing spray to dry dust turns a light film into a muddy, smeared mess that is exponentially harder to remove.
1.4 Surface Chemistry: Understanding pH
Most cleaning failures I see aren't from "not scrubbing hard enough", but from using the wrong pH for the soil and surface.
| pH Range | Classification | Best For | Common Examples |
|---|---|---|---|
| 1 to 3 | Strong Acid | Hard mineral deposits, rust, lime/calcium, some toilet rings | CLR type calcium removers, diluted phosphoric/acetic products. Use only on acid safe surfaces. |
| 4 to 6 | Mild Acid | Light hard water spots, some soap scum | Citric acid based cleaners |
| 7 | Neutral | General dust and oils on delicate surfaces | pH neutral floor cleaners, many enzyme cleaners |
| 8 to 10 | Mild Alkaline | Grease, body oils, food soils | Dish soap, all purpose neutral alkaline cleaners |
| 11 to 14 | Strong Alkaline | Heavy baked on grease, some commercial degreasers | Oven cleaners, heavy duty degreasers. These require strict PPE, ventilation, and surface compatibility. |
Trade-off: Alkalines cut grease beautifully. Acids cut mineral scale beautifully. The wrong one can strip, dull, bleach, etch, or dissolve your finish. They are not interchangeable.
1.5 Dwell Time: The Most Ignored Instruction
When I train a new crew, I stress this: the label's "dwell time" (contact time) is not a suggestion. Disinfectants, in particular, must remain wet on the surface for the entire stated contact time to reach their claimed efficacy. If it dries in 30 seconds, but the label requires 3 minutes, you have just done a cosmetic wipe, not a proper disinfection pass.
Real practice: spray, watch for evaporation (especially in warm, dry rooms), and re-wet lightly if needed to maintain a wet film for that full dwell time. Then wipe/rinse as directed.
1.6 Ergonomics: Work Smarter to Protect Your Body
I've seen too many clients throw their backs out over one weekend of cleaning. I always tell my clients to protect their bodies as diligently as they protect their surfaces:
- Work at waist-to-shoulder height when possible, instead of bending and reaching constantly.
- Lift with legs, not your back.
- Micro-breaks every 45 to 60 minutes for heavy deep-cleaning days.
- Tool extension: use a telescoping duster for high areas instead of overextending on a wobbly chair.
- Two-bucket system (wash bucket + rinse bucket) for mop work: this drastically cuts down on spreading dirty water across clean floors, while also reducing how often you strain your body re-mopping.
Expert Safety Warning (General Science): Never assume "natural" equals "safe for the surface." For example, distilled white vinegar (acetic acid, ~5%) will chemically etch most natural calcium-based stones (marble, travertine, limestone). It can also degrade some polyurethane wood floor finishes and etch or cloud certain grout sealers. Treat every product as a chemical with reactivity. Read its label, test it in an inconspicuous spot, and confirm compatibility before using it over a large area.
The 5-Phase Spring Cleaning System (Ranked by Efficiency)
Over the years, I've refined this down to five phases, ranked by sequence-efficiency. Each phase builds on the last without tracking dirt back through the home.
Phase 1: Decluttering & Staging
Priority: 1 Goal: Create unobstructed access to all surfaces, sort items to their correct homes, and stage a small, contained "to-sort" zone to prevent room-wide chaos.
Essential Tools & Chemistry
- Heavy-duty trash bags, clear bins, donation bins
- Work gloves
- Painter's tape or sticky notes to stage items
- pH-neutral spray for light spot-cleaning as you clear
Step-by-Step Technique
- Zone it. Pick one room, and clear all horizontal surfaces into a single, defined staging area just outside or on a table.
- Sort ruthlessly. Sort each item into: Keep (in place or relocate), Sell/Donate, Trash/Recyclable, or "Decide Later" (time-box this to 15 minutes max).
- Clear the perimeter. Move furniture slightly away from walls only as needed to access baseboards, vents and behind them.
- Surface scan. Inspect for sticky spots or hidden debris while the space is bare.
Speed Hacks
- Timer method: 20 minutes on, 5 minutes off. It fights decision fatigue better than marathon sessions.
- Four-box rule (Keep, Sell/Donate, Trash, Relocate). Be strict with your time-boxes for "undecided".
- Touch it once. If you pick an item up, put it directly where it belongs instead of moving it to a "pile to move later."
Expert Safety Warning: When decluttering, watch for hidden hazards: broken glass, old batteries, expired medications, razor blades, or leaking chemical containers. Wear puncture-resistant gloves when sorting unknown bags or drawers, and properly segregate household hazardous waste (paints, solvents, aerosols) at your local approved drop-off location. Do not toss them in regular household trash.
Phase 2: High-Dusting & HVAC
Priority: 2 Goal: Remove dust from ceiling-height and mid-height surfaces before any wet work. This is the single biggest step to prevent re-soiling your freshly cleaned lower areas.
Essential Tools & Chemistry
- Telescoping microfiber duster (preferably with a removable, washable sleeve)
- Microfiber cloths (200 to 300 GSM for dry dusting)
- HEPA-filtered vacuum with a soft-bristled brush attachment
- Dry electrostatic cloths for delicate blinds/shutters
Step-by-Step Technique
- Ceiling fans. Dust blades with a pillowcase slipped over each blade (to contain dust), then lightly vacuum or shake outside. Work one blade at a time.
- Crown molding, door frames, and tops of doors. Work left-to-right, top-to-bottom in your field of view.
- Light fixtures and vents. Turn off lights/fans at the switch or breaker before cleaning around electrical fixtures. Vacuum vent grilles with a HEPA vacuum, then wipe edges with a barely-damp, clean microfiber cloth (never soak vents).
- Blinds, curtains, and tops of furniture. Close horizontal blinds in one direction, dust, then reverse direction to get the reverse side. For fabric curtains, HEPA-vacuum along pleats, working top-to-bottom.
Speed Hacks
- Work in a small "path" around the room (clockwise) at high-level, rather than criss-crossing. This ensures you don't miss sections or knock dust onto already-dusted areas.
- Use color-coded microfiber (e.g., one color for high-dust, another for kitchens/baths) to strictly avoid cross-contamination.
Expert Safety Warning: Never stand on an unsteady surface to reach high items. Use a properly rated, stable step stool or ladder with three points of contact at all times. For electrical light fixtures, ensure they are off and cool to the touch. Do not spray liquids directly onto electrical components, housings with exposed wiring, or into fan motors. Moisture intrusion into electrical parts is a serious shock and fire hazard.
Phase 3: Kitchen & Heavy Degreasing
Priority: 3 Goal: Attack the #1 binder in most homes: kitchen grease. Cooking oils become sticky, then trap dust, forming a thin, yellow film on cabinets, backsplashes, and range hoods.
Essential Tools & Chemistry
- pH-appropriate degreaser (mild alkaline for everyday, stronger alkaline only where needed and surface-safe)
- Microfiber cloths (350 to 400 GSM for scrubbing/wiping)
- Non-scratching nylon scrub pads (reserve abrasive pads only for truly non-scratch, manufacturer-approved surfaces)
- Spray bottle, detail brushes for crevices, gloves, and adequate ventilation
Step-by-Step Technique
- Range hood & filters. Remove metal mesh filters. Soak in hot water with a few drops of a mild alkaline degreaser in a utility sink for 15 to 20 minutes. Agitate, rinse thoroughly, and air-dry before reinstalling. Check your hood manufacturer's care instructions first.
- Stovetop. Remove grates and burner caps. Degrease them separately. Clean around burner bases per manufacturer guidance (many glass-top ranges require non-abrasive, specifically approved cleaners).
- Cabinet fronts & hardware. Test degreaser on a hidden spot (inside of a door bottom edge). Clean from bottom-up on vertical cabinet fronts when applying a light mist, as this prevents streaking from runs. Pay close attention to the edges and around knobs where hand oils build up.
- Backsplash & walls behind stove. Apply cleaner, give it proper dwell time (often 1 to 3 minutes for cooked-on grease), then gently agitate and wipe clean. Rinse with a clean, slightly damp cloth to remove any chemical residue, then immediately dry with a clean, dry microfiber cloth.
- Appliances (exterior). Follow surface-specific care (stainless steel, black stainless, enamel, plastic). With stainless steel, always wipe with the grain to prevent micro-scratches and visible streaks.
Speed Hacks
- Soak, don't scrub dry. Give baked-on grease dwell time instead of applying excessive pressure. Time + chemistry beats brute force every time.
- Work small sections (about 2 to 3 square feet) at a time. This prevents your cleaner from drying out before you can agitate and rinse it.
Expert Safety Warning: Never, under any circumstances, mix bleach (sodium hypochlorite) with ammonia, ammonia-containing cleaners, or acids (like toilet bowl cleaners). Mixing these produces toxic chloramine gases that can cause severe respiratory irritation or injury. Additionally, mixing bleach with some acidic products can release chlorine gas. Read labels for "contains ammonia" or "acidic". Work in well-ventilated spaces, wear chemical-resistant gloves and eye protection when using strong degreasers, and keep all cleaners clearly labeled and away from children and pets.
Phase 4: Bathroom Sanitation
Priority: 4 Goal: Sanitize high-touch, high-moisture areas while preventing damage to caulk, grout, fixtures, and finishes. In my field experience, moisture control is just as important as disinfection in bathrooms.
Essential Tools & Chemistry
- EPA-registered disinfecting cleaner appropriate for the surface, or a targeted bathroom sanitizer
- Enzyme cleaner for organic soils (body oils, hair, some odors)
- pH-safe cleaner for natural stone (if present)
- Detail brushes, old toothbrushes (dedicated to bathroom only), microfiber, and a separate set of bathroom-only cleaning cloths
Step-by-Step Technique
- Ventilate. Turn on the exhaust fan at full power. If ventilation is poor, open a window and use additional air circulation. Do this before using strong cleaners.
- Dry removal. Remove hair from drains, the shower/tub floor, and vanity. HEPA-vacuum or pick up with a damp, clean cloth before spraying liquids.
- Shower & tub. Address soap scum (often a combination of body oils + hard-water minerals). Apply your product, ensuring you achieve full, uninterrupted dwell time for any disinfectant claim. Keep the surface wet for that entire period.
- Toilet. Clean and disinfect the bowl last for this fixture to avoid splatter onto already-cleaned surfaces. Disinfect the toilet's exterior, handle, and base as high-touch points. Work from cleanest to dirtiest for that object, and change or rinse gloves before moving to other bathroom surfaces.
- Vanity, counters, hardware, and high-touch points. Focus on door knobs, light switches, faucet handles, and drawer pulls. These are transfer points for germs. Wipe, allow required dwell time while wet, then allow to air-dry or wipe per label directions.
- Rinse & dry. Rinse any cleaner/disinfectant residue where the label instructs (especially on surfaces that will have direct skin contact, like tubs and counters), then dry with a clean cloth to minimize moisture that feeds mold and mildew.
Speed Hacks
- Shower first. Apply product to the shower/tub walls and let it dwell while you clean the vanity and toilet. Use that "waiting time" productively instead of watching it.
- Dedicate strictly color-coded cloths to the bathroom. I never allow bathroom-only microfiber to be used anywhere else in the house.
Expert Safety Warning: Natural stone in bathrooms (marble, travertine, onyx, some limestone) is extremely sensitive to acids. Soap-scum removers that contain hydrochloric, sulfamic, or strong acetic acids will etch these surfaces, creating a dull, permanent haze. Use only stone-safe, pH-neutral or manufacturer-approved cleaners for them. Also: ensure adequate ventilation when using disinfectants, avoid inhaling spray mists, and strictly follow the product's EPA-registered contact time and precautionary statements. Never mix different bathroom cleaners together in a bucket or spray bottle.
Phase 5: Floor Deep Restoration
Priority: 5 Goal: Finish last. Floors are the largest horizontal collection point for all the dust and debris you just dislodged from above. Get them right, without overwetting them.
Essential Tools & Chemistry
- HEPA-filtered vacuum (with hard-floor and carpet attachments as needed)
- Microfiber mop (flat mop with removable, washable pads, preferably with a wringer system)
- Two-bucket system: Bucket 1 = clean solution, Bucket 2 = rinse water
- Floor-cleaner specifically formulated for your flooring type (hardwood, luxury vinyl plank/LVP, tile, natural stone, carpet extraction as applicable)
Step-by-Step Technique
- Dry first. Vacuum or dry-mop thoroughly, paying special attention to corners, under furniture, and along baseboards to remove all fine dust and grit. Grit is what scratches floors, not your mop pad alone.
- Mop in sections. Working from the farthest corner of the room toward the exit, mop small sections (about 4 to 6 feet at a time). This prevents you from walking over freshly cleaned flooring.
- Rinse frequently. In the two-bucket system, mop with the clean solution, then rinse the dirty mop pad in the rinse bucket, wring well, and return to the clean solution. Change rinse water when it becomes visibly dirty. Do not "double-dip" a filthy pad into your clean solution.
- Control moisture. For wood and many wood-look products, use a damp (not wet) mop pad. I tell my crews: if you're leaving visible puddles, you're using too much liquid. Excess moisture is the #1 preventable cause of cupping, warping, and finish damage to wood floors.
- Final pass. Go over edges and baseboards lightly with a clean, barely-damp microfiber cloth or pad to catch any missed film, then allow to dry with good air circulation.
Speed Hacks
- Two-bucket discipline. This is the single highest ROI for floor cleanliness. It prevents re-depositing soil back onto the floor.
- High-quality microfiber mop pads. Look for looped microfiber (typically 300 to 400 GSM for mopping) that holds solution well while releasing soil into the rinse bucket when agitated.
Expert Safety Warning: Hardwood, engineered wood, and some bamboo floors have limited moisture tolerance. Over-wetting them can penetrate seams, causing irreversible swelling and finish failure. Natural stone (especially polished marble, travertine, and some slate) must only be cleaned with pH-neutral, stone-safe products. Avoid acidic or highly alkaline "all-purpose" cleaners on these surfaces. For all flooring, follow the manufacturer's care and warranty guidelines before introducing any chemical to a large area.
Room-by-Room Action Matrix
To keep this actionable for any home layout, I use this matrix with my clients to prioritize work based on time, impact, and risk.
| Zone or Room | Priority Focus Area | Best Tool or Chemical | Recommended Time | Surface Damage Risk |
|---|---|---|---|---|
| Entryway/Mudroom | Shoe debris, salt from winter, pet dander, door mats | HEPA vacuum, boot scraper, pH neutral cleaner for tile or concrete | 15 to 30 minutes | Low to Moderate. Excess moisture on unsealed concrete can draw in more soil and stains. |
| Kitchen | Grease, food splatter, cabinet fronts, range hood, trash and recycling | Mild alkaline degreaser, detail brushes, microfiber, 350 to 400 GSM | 2 to 3 hours | Moderate. Abrasives on glass top ranges, strong alkalis on some painted cabinets, or corrosion on uncoated metals. |
| Dining Room | Chair legs, baseboards, light fixtures, table edges, dust from china cabinets | Dry microfiber, pH neutral all purpose cleaner, HEPA vacuum under chairs | 30 to 60 minutes | Low. Watch for moisture rings or overspray on fine wood furniture finishes. |
| Living Room | Ceiling fans, blinds, upholstered furniture, electronics, baseboards | Telescoping duster, HEPA vacuum with upholstery tool, electronics safe dry cloths | 1 to 1.5 hours | Low to Moderate. Liquids near electronics, over-wetting wood trim, and aggressive scrubbing on delicate fabrics. |
| Hallways/Stairs | High traffic soil, scuffs, handrails, corners, stair treads | HEPA vacuum, microfiber mop with two bucket system, pH neutral floor cleaner | 30 to 60 minutes | Moderate. Slip hazards on stairs when wet. Hardwood stair treads are especially sensitive to excess moisture. |
| Bedrooms | Dust on blinds and headboards, mattress, vents, under furniture, baseboards | HEPA vacuum, mattress upholstery tool, damp microfiber, pH neutral cleaner | 45 to 90 minutes | Low. Over-wetting nightstands or bed frames with a fragile finish. Avoid soaking mattress surfaces. |
| Bathrooms | Soap scum, hard water, high touch points, grout, toilet, ventilation | EPA registered disinfectant, stone safe if marble, enzyme cleaner, detail brushes | 1 to 2 hours | High. Acidic cleaners on natural stone, caulk damage from harsh abrasives, and inadequate ventilation when disinfecting. |
| Laundry Room | Washer gasket, dryer lint trap and duct, accessible parts, utility sink, floor | Enzyme cleaner for mildew, pH neutral or manufacturer approved washer cleaner, lint removal | 30 to 75 minutes | Moderate. Chlorine bleach misuse, damaging rubber gaskets with sharp tools, or failing to clear dryer lint, which is a fire hazard. |
| Windows and Glass | Tracks, sills, screens, interior and exterior glass | Dedicated glass cleaner, ammonia free for tinted windows, small detail brushes, lint free microfiber | 45 to 90 minutes for whole home | Moderate. Ammonia based glass cleaners can damage some window films and tints. Scraping tracks with metal tools can scratch painted or aluminum finishes. |
| Whole Home Floors | Final pass, edges, transitions, door thresholds | Type specific cleaner, two bucket microfiber mop, HEPA vacuum | 1 to 2 hours | High if mismatched. The largest risk is using an incorrect pH or too much water for your specific flooring material. |
Surface-Specific Troubleshooting & Neglected Zones
In my experience, the "clean" parts of a house pass inspection. It's the neglected zones that tell me how long it's really been since a proper deep clean. Here are the ones I address on nearly every spring job, along with how to do them without ruining the surface.
4.1 Baseboard Grime
Problem: A thin line of gray-black grime builds up along the top edge and shoe of baseboards (a mix of dust, cooking oils, and foot traffic).
Solution:
- Dry first. Vacuum the top ledge with a brush attachment to remove loose dust.
- Spot-clean. Mix a few drops of pH-neutral cleaner with water. Wrap a clean microfiber cloth around a narrow putty knife or use a small detail sponge.
- Technique. Work in 2 to 3 foot sections, wiping top-to-bottom and immediately following with a second, clean, barely-damp cloth to "rinse" any residue. Dry with a third clean, dry cloth.
- Painted baseboards: Avoid aggressive scrubbing or strong solvents that can burnish (shine) flat paint.
Expert Safety Warning: On baseboards with oil-based or very matte paint, excess moisture can wick into the wood behind the trim and can stain or soften some older paints. Use only lightly dampened cloths, never saturated ones.
4.2 Window Track Buildup
Problem: Window tracks collect a cement-like mix of dirt, dead insects, pollen, and old lubricant, especially in double-hung windows.
Solution:
- Vacuum. Use a crevice tool and a small brush attachment to pull out loose debris.
- Loosen. Spray a small amount of pH-neutral cleaner directly into the track. Let it dwell for 2 to 3 minutes (do not flood the track, especially if it's near wood framing or sill interiors).
- Agitate. Use an old, clean toothbrush or a small, stiff nylon brush to work the cleaner into corners and weep holes.
- Extract. Wipe with a slightly damp, clean microfiber cloth, twisting it to get into tight channels. Follow with a dry cloth. Be careful not to clog or block weep holes (the small drainage holes at the bottom of window tracks), since they exist to drain exterior moisture.
Expert Safety Warning: Do not pour large amounts of water into window tracks. Many older window frames are wood, and trapped moisture leads to rot. Also, avoid using sharp metal scrapers on aluminum or painted tracks, as they easily gouge the finish.
4.3 Washing Machine Gasket Mold (Front-Load Washers)
Problem: Front-loading washing machines have a rubber door gasket (bellows) that traps moisture, detergent residue, and lint. This creates the perfect environment for mildew odors and visible mold growth. I've seen this in well-used homes more times than I can count.
Solution:
- Inspect. Pull back the entire fold of the gasket and inspect hidden crevices (especially the bottom, where water pools).
- Dry clean. Remove any visible lint, hair, or debris by hand, wrapped in a damp cloth.
- Clean. Use a washing machine gasket cleaner that is approved by your washer manufacturer, or a diluted, manufacturer-safe solution. For organic mildew, an enzyme-based cleaner can be very effective at breaking down the bio-film, while some situations call for a proper disinfecting product formulated for rubber gaskets.
- Scrub gently. Agitate with a soft nylon brush or a clean, folded microfiber cloth. Do not use abrasive pads or sharp objects on the rubber.
- Rinse. Wipe thoroughly with a separate clean, damp cloth to remove all cleaner residue (residue can attract more soil).
- Dry & maintain. Wipe the gasket completely dry after every load going forward. Leave the washer door slightly ajar between uses to allow air circulation.
Expert Safety Warning: Some washer manuals explicitly warn against using undiluted chlorine bleach repeatedly on their door gaskets, as it can cause premature cracking, hardening, and discoloration of the rubber. Always follow your appliance manufacturer's care instructions. If you use any disinfectant on a gasket, confirm it's compatible with EPDM rubber, ensure ventilation, and rinse off any residue that could contact clothing next cycle.
4.4 Mattress Sanitization
Problem: Mattresses collect dust mites, shed skin cells, body oils, and odors over the years. They cannot be submerged or heavily wetted.
Solution:
- Strip & vacuum. Remove all bedding. Using a HEPA-filtered vacuum with an upholstery attachment, slowly vacuum the entire top surface, sides, seams, tufts, and the space under the bed. Go over seams multiple passes at a slow pace.
- Spot-treat stains. Treat only localized stains with a small amount of an enzyme cleaner formulated for upholstery. Enzymes break down protein-based stains (sweat, urine, body oils) rather than just bleaching the color.
- Apply lightly. Spray or dab extremely lightly, and never saturate the mattress. The goal is a barely-damp spot, not wet padding.
- Blot, don't rub. Blot with a clean, dry, absorbent, white cloth to lift moisture and soil. Rubbing drives the stain deeper into the fibers and batting.
- Deodorize. Lightly dust a very thin layer of food-grade baking soda over the surface (test a small hidden area first for delicate covers). Let it sit for 4 to 6 hours in a well-ventilated room, then vacuum thoroughly with your HEPA upholstery attachment.
- Protect & dry. Allow the mattress to air-dry completely (ideally with air circulation and low humidity) before putting sheets back on. Use a mattress protector going forward to prevent future soiling.
Expert Safety Warning: Mattresses contain foam, batting, and sometimes inner springs wrapped in materials that hold moisture. Over-wetting leads to mildew growth inside the mattress, which is extremely difficult to remove. Never steam-clean a standard mattress unless the mattress manufacturer explicitly states it is safe for steam. Some waterproof covers and foams can be damaged by excess heat and moisture. Always err on the side of "damp" and ensure full drying time.
4.5 Handling Sensitive Surfaces Correctly
I always tell my clients: treat materials by their mineral/organic makeup, not by how "tough" they look.
| Surface | Common Mistakes | What I Do in the Field | Approved Cleaners |
|---|---|---|---|
| Hardwood Flooring | Using vinegar, wet mopping, oil soaps that leave residue | Use a manufacturer approved, pH neutral hardwood floor cleaner with a barely damp microfiber mop. Clean up spills immediately. | pH neutral, water based, specifically labeled for finished hardwood. Follow NWFA, National Wood Flooring Association, aligned guidance for your finish. |
| Natural Marble | Using any acid, including vinegar, lemon, and many bathroom spray cleaners, or abrasive powders | Treat as acid sensitive. Only use stone safe, pH neutral cleaners. Blot spills, especially wine, coffee, and fruit juice, within minutes to avoid etching and staining. | pH neutral cleaners explicitly labeled "safe for natural stone/marble." |
| Travertine/Limestone | Same as marble. These are even more porous in many honed finishes. | Clean with low moisture methods, avoid soaking grout lines, and be vigilant with resealing intervals. Porous stone needs periodic sealing. | Stone safe, non acidic, low foam products. Test in an inconspicuous area. |
| Granite/Quartzite | Less acid sensitive than marble, but still can be damaged by harsh, highly alkaline strippers or by some abrasive pads. | Generally more forgiving, but I still avoid strong acids and highly abrasive cleaners on polished surfaces. Check sealer condition on granite annually. | Mild, pH neutral or mildly alkaline stone safe cleaners. Do not rely on vinegar. |
| Engineered Quartz, Quartz Composite | Assuming it's indestructible. Harsh solvents, highly alkaline oven cleaners, or undiluted bleach can discolor resin binders. | Clean with a soft cloth and a mild, pH neutral cleaner. Avoid exposing seams and edges to prolonged standing moisture. | pH neutral all purpose, non abrasive. Follow the manufacturer's care guide for your brand. |
| Stainless Steel | Using steel wool, circular scrubbing, or cleaners with chlorine that can pit or streak | Always wipe with the grain of the brushed finish. Use a clean, soft microfiber cloth. For fingerprints, a tiny amount of a stainless safe cleaner, wiped dry, prevents streaks. | Non abrasive, stainless steel approved cleaners, or a diluted pH neutral solution. Avoid chlorine bleach on uncoated stainless unless the manufacturer explicitly permits it and specifies dilution and rinse. |
Expert Safety Warning: Etching from acids on natural stone is not a "stain" you can wash off. It is a physical change to the polished surface (a dull spot). Prevention and testing are your only reliable insurance. For any product you've never used on a particular stone, wood, or specialty finish, test in an inconspicuous area first, observe for at least 1 to 2 minutes of dwell (and after drying), and inspect under normal lighting before proceeding to a visible area.
The 3-Step Prevention & Maintenance Protocol
The biggest return on your labor after completing your work for cleaning for spring is to lock it in. I never leave a client without a simple, realistic maintenance plan. If it takes more than 5 to 10 minutes a day, it won't be done consistently.
Step 1: Entryway Filtration (Stop Dirt at the Door)
Goal: Capture a large percentage of tracked-in soil before it spreads onto carpets and hard floors.
- Outside mat: Use a durable, textured doormat outside each exterior door to scrape off mud and larger debris.
- Inside mat: Place an absorbent, washable mat just inside to capture finer dust and moisture (especially during wet weather).
- Shoe policy: In my own homes and with many clients, a simple "shoes-off or shoes-in-entry" rule cuts down on tracked-in grit, road salt, and outdoor pollutants more effectively than any weekly mopping alone.
- Maintenance: Shake out or vacuum mats at least once a week. Wash washable mats as needed, and allow them to dry fully before placing back.
Step 2: The 5 to 10 Minute Daily Reset
I call this a "reset", not a "re-clean." It's about returning high-impact areas to baseline, without re-doing your deep clean.
My field-tested daily checklist (about 5 to 10 minutes total):
- Kitchen counters & sink (2 to 3 min): Clear clutter, wipe with a clean, damp microfiber cloth, and spot-dry. Keep your sink free of food scraps and standing water.
- Dining/living room quick scan (2 min): Clear visible crumbs from tables, fluff cushions, and do a 30-second scan for obvious spills.
- Bathroom wipe (1 to 3 min): Quickly wipe down the bathroom countertop, faucet, and toilet handle with a clean, lightly damp microfiber cloth. Spot-check for any water splatter on mirrors or floors.
- Quick sweep of entry (1 min): Scan and pick up any debris tracked in that day.
This is a realistic habit. Done daily, it prevents soils from bonding and becoming the "deep-clean only" type of buildup.
Step 3: Humidity Control (Control Moisture, Control Mold)
Moisture management is sanitation. In many climates, I've found this to be the most overlooked factor for long-term cleanliness.
- Target range: Keep indoor relative humidity between 40% and 50% whenever possible. Below ~30% can be uncomfortably dry, while consistently above 60% promotes dust mite activity and mold/mildew growth.
- Use a hygrometer: Don't guess. An inexpensive digital hygrometer gives you accurate readings for each level of your home.
- Ventilate properly: Run exhaust fans during and for 15 to 30 minutes after showering or cooking (especially boiling water or frying). Confirm your bath fan is actually moving air (a simple piece of toilet paper held up to the grille will tell you if it's drawing properly).
- Address leaks immediately: Even a tiny, slow drip under a sink, around a toilet, or near a window can feed hidden microbial growth behind cabinets or walls. Treat water leaks as a priority, not a "next weekend" item.
- Dehumidify as needed: In damp basements, laundry rooms, or humid seasons, a properly sized dehumidifier is far more effective for mildew prevention than spraying air fresheners.
Expert Safety Warning: "Musty" odors are often an early warning sign of hidden moisture or microbial growth. Do not simply mask them with fragrances. Find and correct the moisture source first. If you encounter visible mold growth covering a large area (generally greater than ~10 square feet in many remediation guidelines), or if mold is inside HVAC ductwork or behind walls, consult a qualified mold remediation professional rather than attempting aggressive DIY disturbance, which can aerosolize spores.
Final Thoughts
The work you put into proper sequencing pays you back for days, not hours.
When you work at a steady, honest pace, your home stays in order because you've stopped fighting gravity and put it to work for you.