



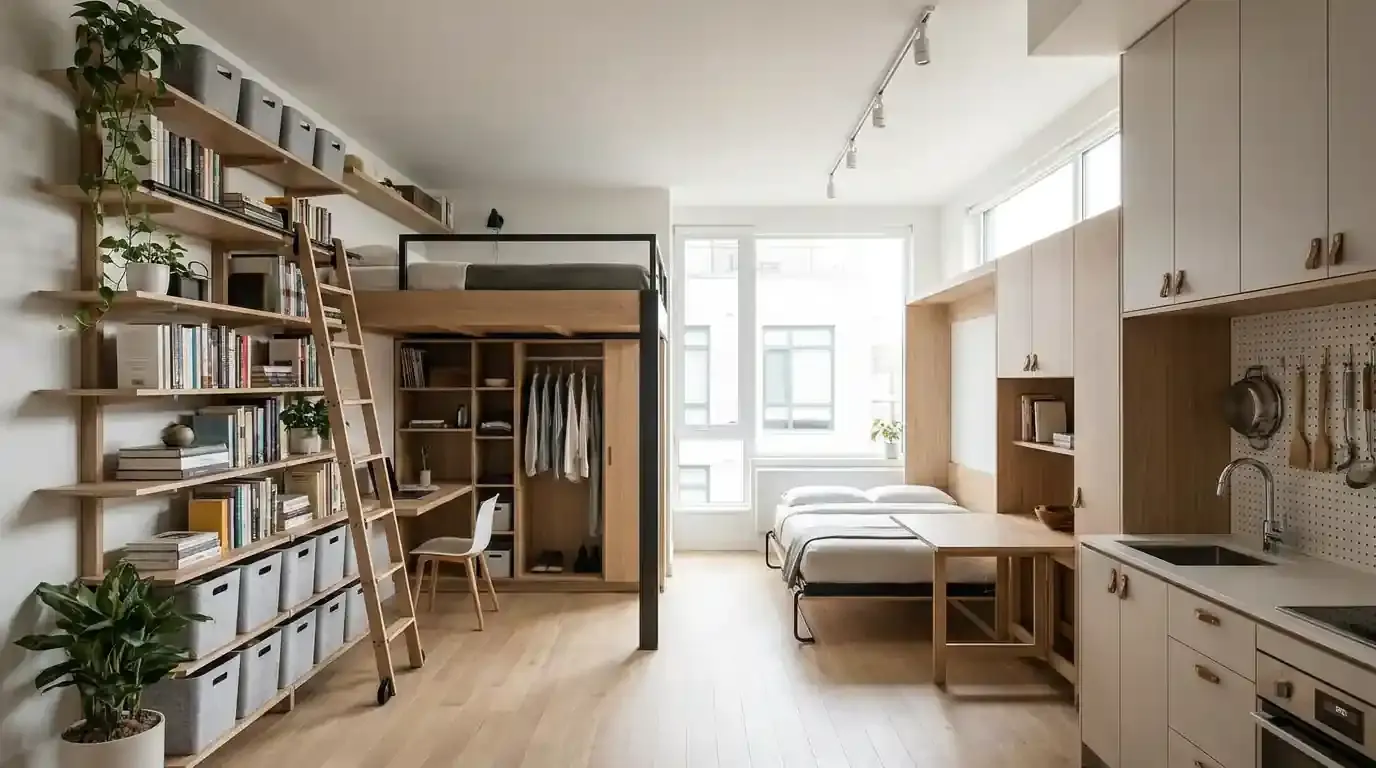
In my studio projects, I never ask clients how much square footage they have first. I ask how much air volume they have. The 3-Dimensional Volume Rule means treating a room as cubic feet, not floor footprint. For most rental units, I only count usable vertical air space up to 8 feet (243.8 cm), since anything above 8 feet is either blocked by HVAC soffits, slanted ceilings, or unreachable without a step stool rated for unsafe overreach. By shifting infrequently used items to the zone between 48 inches to 96 inches (or higher only if pull-down hardware is used), I can utilize empty wall voids while keeping all floor space between 30 inches to 36 inches clear for walking.
I draw a hard line with this rule: never take vertical space at the cost of horizontal clearance. For example, a wall shelf at 72 inches may be usable, but if its depth extends past 12 inches into a walkway that was already 36 inches wide, the effective mobility drops drastically. In a 10-foot by 10-foot room (100 sq ft), gaining 2 cubic feet of closed storage is worthless if it cuts a required egress path below 30 inches of unobstructed floor clearance. So when I calculate storage gain, I subtract the lost circulation area before I count any added volume.
The 3 Biggest Spatial Mistakes Renters Make
What I often see clients get wrong is buying furniture based on how big its top surface is, rather than how its footprint impacts movement.
Buying deep furniture that blocks walkways: I see too many renters purchase a 24-inch-deep media cabinet for a hallway or studio. In any circulation space under 36 inches wide, I cap cabinet depth at 16 inches. Anything over 18 inches in a single-traffic walkway forces a body to pivot, creating a bottleneck.
Ignoring the clearance height under low-profile bed frames: A bed sold as "low profile" can still only have 5 inches to 7 inches of usable under-bed clearance once you account for the bed slats, support bars, and castor height. If a renter buys 12-inch-tall plastic totes for a bed with 6.5 inches of clearance, they will never roll them out. I always measure the true vertical void (from finished floor to the bottom of the bed frame's lowest obstruction) before buying any bins.
Treating wall space as only "eye level": Most renters stop mounting items at around 48 inches. In my practice, I use the dead zone from 12 inches to 24 inches (if blocked by furniture) and the upper zone from 54 inches to 84 inches, as long as the projected load falls under the anchor's weight rating. Leaving that upper air space empty while shoving everything onto the floor is the most expensive mistake made in a 300 sq ft rental.

The 5 Best High-Efficiency Storage Solutions (Engineered & Evaluated)
Method A: Hydraulic Lift Up-Storage Beds
In my studio projects, these beds trade the pull-out access of rolling bins for a vertical lift that exposes the entire bed platform at once.
Specs:
Ideal mattress thickness: 6 inches to 10 inches. Mattresses over 12 inches add too much weight to the lift mechanism and slow the opening arc.
Piston weight ratings: Dual gas pistons ranging from 600 lbs to 850 lbs of lift assistance (rated for the combined weight of the mattress plus platform hardware). Never rely solely on the "bed weight limit", but rather the piston cycle rating.
Usable clearance under platform cavity: 7 inches to 14 inches, dependent on the bed's leg height and crossbeam structure.
Cubic feet gained vs. standard under-bed totes: A full queen lift bed (60"W x 80"L) with a 10-inch internal cavity gains roughly 27.8 cu ft of enclosed space. A standard 6-inch high rolling tote setup under the same bed frame averages only 16.7 cu ft due to wheel housing and pull-out clearance.
Notes for Renters:
Lift beds are not modular. Factor in a 36-inch to 42-inch unobstructed swing zone at the foot or side when opened (depending on hinge arc), as this area cannot be blocked by nightstands or room dividers.
Method B: Tension-Mounted Wall Unit Systems
I use these for renters who cannot drill into every stud or are restricted to only small pilot holes. Tension systems use floor-to-ceiling compression, not shear bolts alone.
Specs:
Mounting type: Drill-free, vertical compression between finished floor and ceiling (must be a solid, level substrate).
Floor-to-ceiling pressure limits: 40 to 90 lbs of distributed compression. Do not exceed manufacturer-specified pressure. Avoid installing on floating laminate over uneven subfloors, as this throws off load distribution.
Shelf depth caps: 10 inches to 12 inches. I never spec past 12 inches, as anything 14 inches or greater creates a pronounced overhang into a walking path while increasing the forward moment force against the poles.
Max shelf load: 15 to 30 lbs per shelf (when evenly distributed). Concentrated loads (e.g., stacks of textbooks) must be centered over the vertical pole, not the front edge.
Recommended ceiling height range: 7'6" to 8'0". Ceilings under 7'5" limit adjustability, while textured popcorn ceilings can slip under the top rubber foot.
Notes for Renters:
These systems are freestanding under compression, not "hung". That means they must stay unloaded during any forced adjustment and cannot be used to brace pull-up body weight.

Method C: Over-the-Door Pocket Systems with Rigid Frames
Most over-the-door hooks fail from hinge stress, not the fabric. For this reason, I only specify pocket systems that use a rigid top rail (not a single sewn loop) to distribute weight across the door's top edge.
Specs:
Material comparison:
Heavy-duty canvas: Higher puncture resistance, less reflective, holds shape better under partial loads. Average stretch: low.
Clear vinyl: Easy visibility, lighter weight, prone to sagging over time if overloaded (especially near heat sources like bathroom doors).
Weight tolerances per door hinge: 5 to 15 lbs total distributed across all pockets (for standard hollow-core interior doors). For solid-core doors, hinge knuckles can tolerate slightly more, but the door itself becomes heavier to swing. I cap most micro-apartment installs at 10 lbs total.
Pocket dimensions: 5" to 8" W x 4" to 7" D x 8" to 12" H per pocket. I cap individual pocket depth at 5 inches for frequently opened doors. Anything over 6 inches pulls the entire unit away from the door face when loaded, increasing leverage on the top hooks.
Clearance: Leave a minimum 1/2-inch gap between the bottom pocket and the finished floor sweep to prevent scraping when opening or closing the door at a 90-degree angle.
Notes for Renters:
Never mount over doors that are fire-rated egress doors, or doors with automatic closers (the added weight alters closer tension).
Method D: Nested & Drop-Leaf Furniture
I rely on this solution the most for living and sleeping combo areas. The trade-off isn't cost—it's the time to expand or collapse, and the required clear space to do it safely.
Specs:
Folded footprint: Reduce table surface by 40% to 70% depending on the hinge type (wall-mounted drop-leaf vs. freestanding gate-leg).
Expanded clearance needed: A 30"W x 20"D drop-leaf table needs at least 36"W x 36"D of unobstructed floor space when open to allow seating without forcing chairs into a main walkway.
Nested clearance: Stacked stools or chairs should nest with a vertical offset of at least 1 to 2 inches between seats to prevent binding, and cannot exceed a stacked height of 36 inches if stored beside a refrigerator or in a tight vertical slot.
Load capacities: Wall-mounted drop-leaf brackets: 20 to 50 lbs (when attached into at least one stud, or with approved heavy-duty anchors specified by the manufacturer). Freestanding nested tables: 15 to 40 lbs tabletop load to prevent tipping when only one leaf is up.
Hardware lifespan: Look for cold-rolled steel hinges (not stamped thin metal), with a minimum leaf support brace for surfaces over 24 inches in length.
Notes for Renters:
If drilling into a wall is not allowed, stick to freestanding nested pieces (e.g., nesting side tables) over wall-hung drop leaves.
Method E: Wall-Mounted Pegboard & Track Systems
For renters wanting adjustable hooks over time, I use a hybrid approach: pegboards mounted with approved removable hardware only when unavoidable, or track systems that spread load across multiple attachment points.
Specs:
Mounting for renters: When mounting directly into drywall with no studs, use heavy-duty toggle bolts (not plastic expansion anchors) rated for the intended load. Each toggle bolt must engage a minimum 1.75 inches of hollow cavity behind 1/2-inch drywall. For 5/8-inch drywall, follow the bolt manufacturer's grip range.
Weight rating: 5 to 20 lbs per individual peg or hook when loaded in shear, with a total distributed system cap of 30 to 50 lbs per mounting rail (assuming 3 or more attachment points). Never hang items that swing (e.g., cast iron pans) off a single peg.
Material thickness: 1/4-inch perforated hardboard is light, but sags over spans greater than 32 inches without a horizontal furring support. 3/8-inch plywood (with shop-drilled holes) or metal pegboard holds more weight with less deflection.
Peg spacing & depth: Standard 1-inch hole spacing. For small apartments, I cap the pegboard projection from wall at 4 inches to 6 inches to keep it out of walkways. Avoid adding bulky baskets that push past 6 inches.
Track systems: Slotted aluminum wall tracks allow hooks to slide laterally, spreading weight across two or more fasteners. I prefer these over one large fixed board when the only available mounting area is between two widely spaced studs (24" O.C.) and renters need flexibility.
Notes for Renters:
Always patch-test and reference your lease before any drilling. Some buildings only allow adhesive mounting, which falls well below these weight ratings.

Storage Solution Comparison
| Solution Name | Cubic Feet Gained | Renter-Friendly Score (1–10) | Ideal Room | Est. Cost Range |
| Hydraulic Lift Up-Storage Beds | 16.7 – 27.8 cu ft | 6 | Living / Sleeping Combo Area | $375 – $1,150 |
| Tension-Mounted Wall Unit Systems | 3 – 9 cu ft | 9 | Entryway / Foyer | $95 – $275 |
| Over-the-Door Pocket Systems with Rigid Frames | 0.8 – 2.5 cu ft | 10 | Kitchen / Kitchenette | $20 – $65 |
| Nested & Drop-Leaf Furniture | 1 – 5 cu ft (hidden floor reclaim) | 8 | Living / Sleeping Combo Area | $90 – $375 |
| Wall-Mounted Pegboard & Track Systems | 1 – 4 cu ft | 7 | Kitchen / Kitchenette | $40 – $175 |
Room-by-Room Spatial Breakdown
Entryway / Foyer (Under 15 sq ft)
Hack #1: Utilize the "toe-kick" vertical pocket. In my projects with ultra-shallow entries (often 3' x 5'), I don't build up, I build low. For a freestanding shoe rack, I leave at least 24 inches of unobstructed door swing first, then only use a floor footprint of 18"W x 10"D max. Instead of a deep bin, I use a slotted shoe tray with a height cap of 4.5 inches. This keeps shoes off the walking surface without blocking the required 30-inch minimum egress path out of the unit.
Hack #2: Claim unused wall space above the door frame trim (carefully). If your entry has a solid wall adjacent to the front door (not the door itself), look at the narrow strip from 78 inches to 84 inches up to 8 feet. I only recommend storing flat, ultra-light items (e.g., infrequently used tote lids) in this zone with a shelf depth cap of 8 inches and a per-shelf load cap of 5 lbs. Do not attempt this over the rental's fire door.
Kitchen / Kitchenette
Hack #1: Mount narrow rails on the side of an end cabinet (if allowed). Not every renter can drill into the kitchen backsplash. However, some freestanding kitchenette cabinets have an exposed, non-structural end panel. For these, I use a 3/4-inch-deep adhesive or clamp-on track rated for light duty, capping each hook at 2 to 3 lbs. The key measurement: any utensil hung here must protrude no more than 3.5 inches from the cabinet face to prevent it from jutting into a galley walkway (ideally keeping the aisle at least 36 inches clear).
Hack #2: Exploit the vertical gap between the top of a fridge and the upper cabinet soffit. In my rental renovations, I see a void anywhere from 2 inches to 10 inches above many apartment refrigerators. Never attempt to slide a loose plastic bin here to be pulled by hand. Instead, use a rigid, pull-out-on-rails organizer only if there is at least 5 inches of clearance and the item being stored is both flat and never needed daily (to avoid unsafe reaching over a warm appliance). Max weight for this zone: 5 lbs. If the gap is under 3.75 inches, leave it empty.
Living / Sleeping Combo Area
Hack #1: Create storage behind the "sleeping head zone" without stealing floor space. For a bed pushed against the largest uninterrupted wall (common in studios), I specify a shallow floating ledge or a 10-inch-deep wall cubby starting at a minimum of 24 inches above the top of the mattress (to prevent bumping while sitting up in bed). Load cap: 7 to 15 lbs per cubby, with wall attachment into studs when possible. Most importantly, I do not let this cubby extend past the width of the bed itself. This prevents it from protruding into the open living circulation area once you leave the bed space.
Hack #2: Divide with a double-duty, ventilated cabinet on casters. Instead of a solid, floor-locked room divider that blocks light, I use a narrow rolling storage unit (max 16" D x 36" W x 36" H). The shallow depth is non-negotiable for a combo room: at 16 inches, it can split a zone while still allowing a primary walkway of at least 30 inches on at least one side. I require locking casters (rated to hold the loaded weight of the cabinet), with a bottom clearance off the floor large enough to roll over standard rental carpet pile (minimum 1.75-inch caster height). Max loaded weight: 50 lbs to keep it pushable by one person without strain.